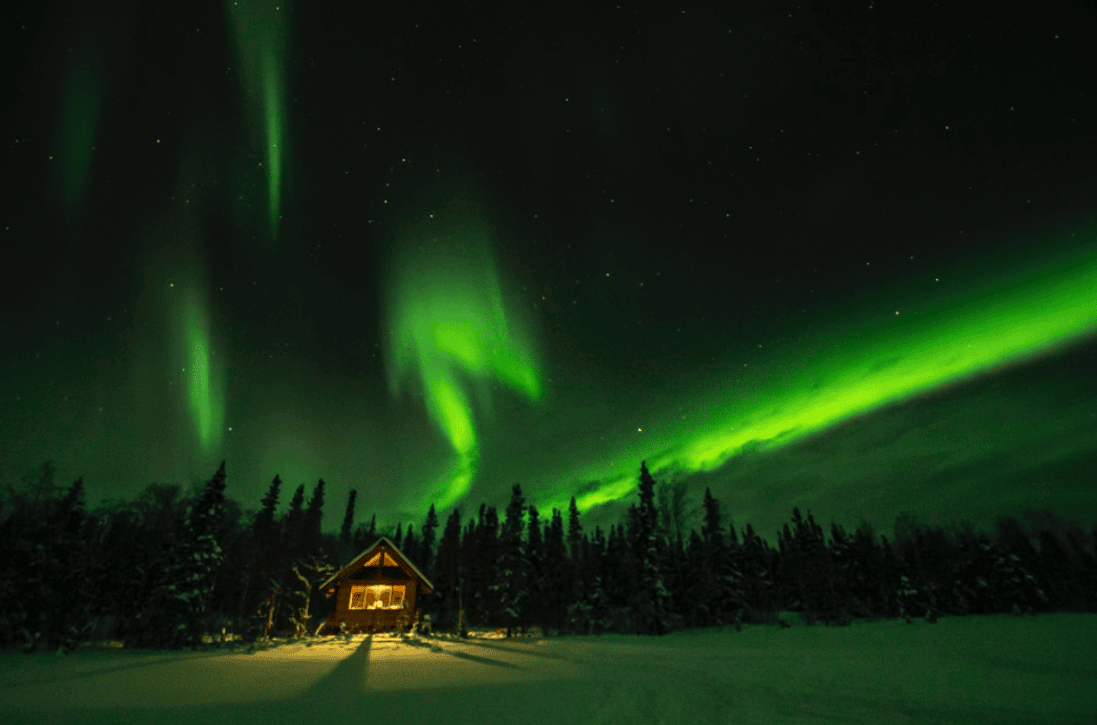
Northern Lights photography is not like other night photography; it has challenges that go way beyond normal night photography challenges – namely…the cold! You only get Northern Lights in the winter when you have those gorgeous dark skies. In addition, the aurora oval revolves around the geomagnetic north pole placing you in some of the coldest environments on earth. All of this means you are going to be waiting out in the cold for the perfect photograph of the northern lights.
If your dream is to photograph the northern lights, then you’ll need to be in the right place, have the right camera equipment, and be prepared with your camera settings. And you’ll want to ensure that you stay warm while you are working on your perfect photograph.
I have spent a lot of time photographing the northern lights in Alaska. I’ve even been lucky enough to see the southern lights on a cruise to Antarctica! From these experiences I’ve accumulated an extensive list of tips for ensuring your aurora photography turns out great, you stay warm, and have fun. I’m excited to share these tips for shooting the Northern lights while staying cozy.
What are the Northern Lights?
I’m no scientist – but I can tell you aurora borealis is a recipe made up of the sun, solar bursts, solar wind, the earth’s magnetic fields, and our atmosphere. If you want an in-depth explanation, check out this Northern Lights Defined article.
Indigenous Explanations of the Northern Lights
In addition to the scientific explanation, there are also Indigenous explanations too. The Alaskan Native people and Inuit believe that the Northern Lights are the spirits of their ancestors hunting in the night sky, and that’s why they are active and moving.
Another version is the spirits of the ancestors watching over their loved ones on earth. The spirits are so friendly, it is said you can invite them for a ‘dance’. When you dance, they will join you dancing and you can essentially ‘dance them out’.
When I was told this, I wondered if the Hokie Pokie dance would work – it’s the only dance I know! At least if you choose to ‘dance them out’, it’s also a great way to stay warm simultaneously!
Where to Find the Northern Lights
You find the northern lights under the aurora oval. The oval thickness changes periodically, but in general, you’ll find the aurora oval around the Earth’s geomagnetic poles. You’ll also need clear skies in order to see the northern lights. This means that some of the best odds of seeing them are places with clear skies.
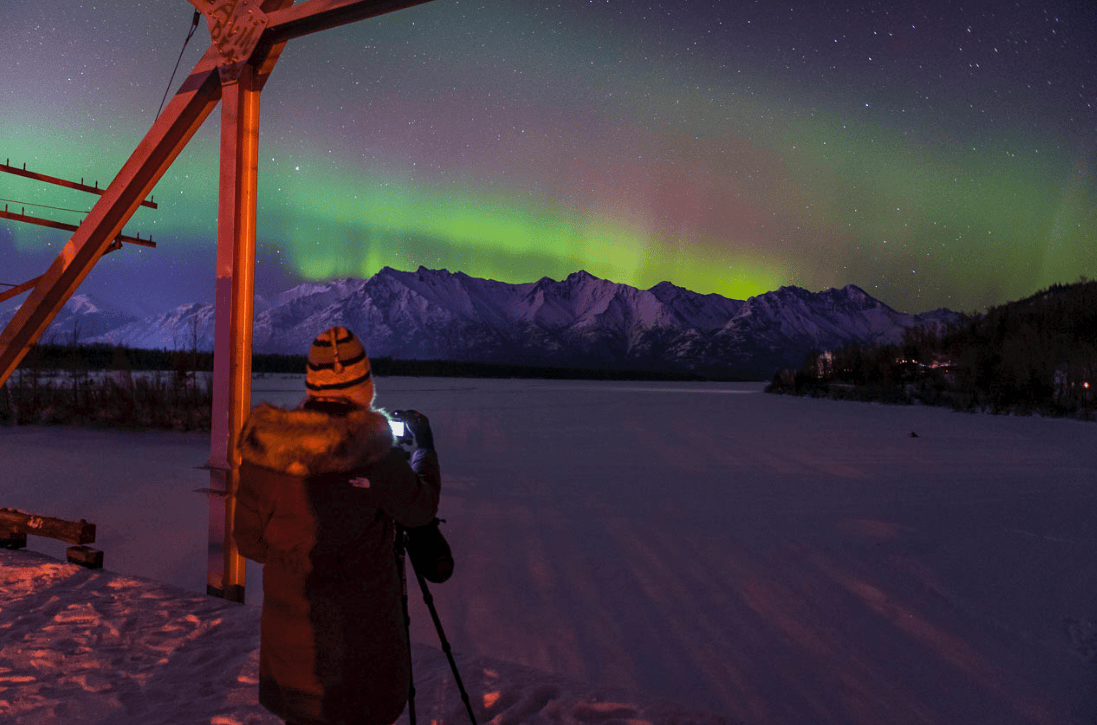
My favorite place to photograph the aurora borealis is Fairbanks Alaska. It’s in the Alaskan interior, which means more clear skies and a greater chance of seeing them. Plus there are plenty of great things to do in Fairbanks (dog sledding, snow mobiling, in addition to chasing aurora!
Some other great places are:
- Yellowknife Canada (Yukon)
- Churchill Canada (Manitoba)
- Northern Norway
- Iceland
- Northern Finland
- Greenland
- Northern Sweden
Of course, you may be able to photograph them in Minnesota or Montana – however, the odds are much lower. I prefer to go to destinations under the aurora oval where I have a favorable aurora forecast most of the time, and good odds of clear skies for the best photography. That’s Alaska for me.
Camera Equipment You’ll Need for Photographing the Northern Lights
There are a few extra things that you’ll need for night photography, and specifically northern lights pictures, that are different from a typical photography gear list.
Tripod
I never normally travel with a tripod, but in the case of night photography, it is a must. You’ll want a good sturdy one that can deal with wind. Plus – make sure that it isn’t metal. Metal tripods can get incredibly cold, and you don’t want to touch freezing-cold metal, even with gloves. I use the Peak Design Travel Tripod which is incredibly small but sturdy and fast to get into position!
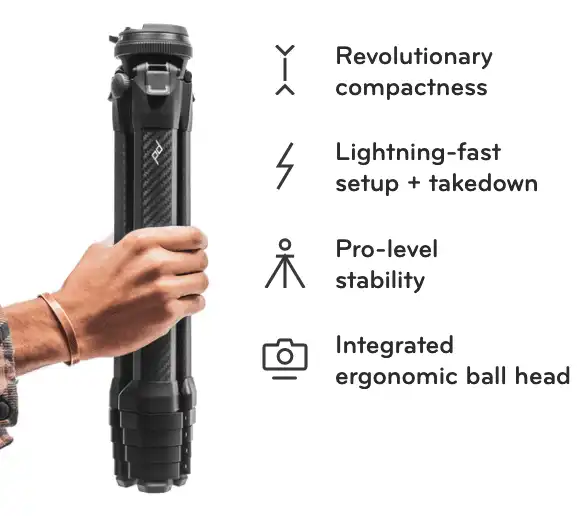
Peak Design Travel Tripod
$379.95
This is the smallest and sturdiest travel tripod I have found on the market. This is an aluminum version (3.4 lbs) - but they also have carbon fiber (2.8 lbs). A travel tripod that packs down to the diameter of a water bottle—without compromising height, stability, or features. Plus, it's so easy and fast to setup and take down!
Buy Now
I earn a commission if you click this link and make a purchase, at no additional cost to you.
Wide Angle Fast Lens
Any lens will work, but the wider the lens, the better. Northern Lights can take up a big area of sky and you want to capture as much of the show as possible in addition to the foreground. In fact, if you are doing northern lights photography underneath the aurora oval, the aurora will normally show up arcing across the sky like a rainbow. To capture that entire shot, you will need a wide-angle lens.
When in Fairbanks, Alaska, photographing the aurora borealis, I shot with a 10mm or 18 mm most of the time. Generally, a focal length of 14 to 30mm is what you should aim for. Fairbanks is normally directly underneath the aurora oval, so it’s nice to be able to get a big wide view of how high in the sky the lights climb. However, a 24 mm also works, but you’ll likely not get the full arc of the northern lights. Just be aware that a 10mm lens tends to distort things in the foreground.
In addition, the fastest (lowest F stop number such as f1.8 or f2.8) lens you can use the better. This allows you to work with more light – something that is in short supply during night photography. Without a fast lens, exposures will need to be longer, and that will tend to blur the aurora more. My fastest, widest lens only went to f4, and I could still shoot at shutters of 10 seconds without too much of a problem. Use what you have of course – because anything is better than nothing!
Rent a Lens for Aurora Photography
If you don’t have a wide angle, fast lens, don’t fear – you don’t need to go out and spend thousands of dollars on a lens just for northern lights photography. Instead, you can rent a great lens for Aurora photography.
I have rented from both Borrow Lenses in the past. I rented the Zeiss Batis 18mm f/2 for Sony E-mount for ten days costing aproximately $120. This includes shipping. I didn’t get the insurance though as I have other travel insurance that will cover it. Side note – I always feel like the insurance is a sham on these things. Before purchasing the insurance out of fear, first check to see if any of your other insurance (home, travel, credit card) will cover the lens.
This was a great lens with high-quality glass for capturing the northern lights. You can obviously get something even better like the Sigma 14mm f/1.8 Art E Mount. That’s the great thing about Borrow Lenses – you can try out a lens before you buy it.
Camera
I use a Sony A7iii mirrorless camera. Not too long ago I switched to mirrorless from my Canon DSLR system. The main thing to look for in a camera used to photograph the northern lights is low-light performance (higher ISO). ISO range of 100-51200 is ideal. In addition, battery life and weather sealing are also important, which is essential for the long and cold nights under the Northern Lights.
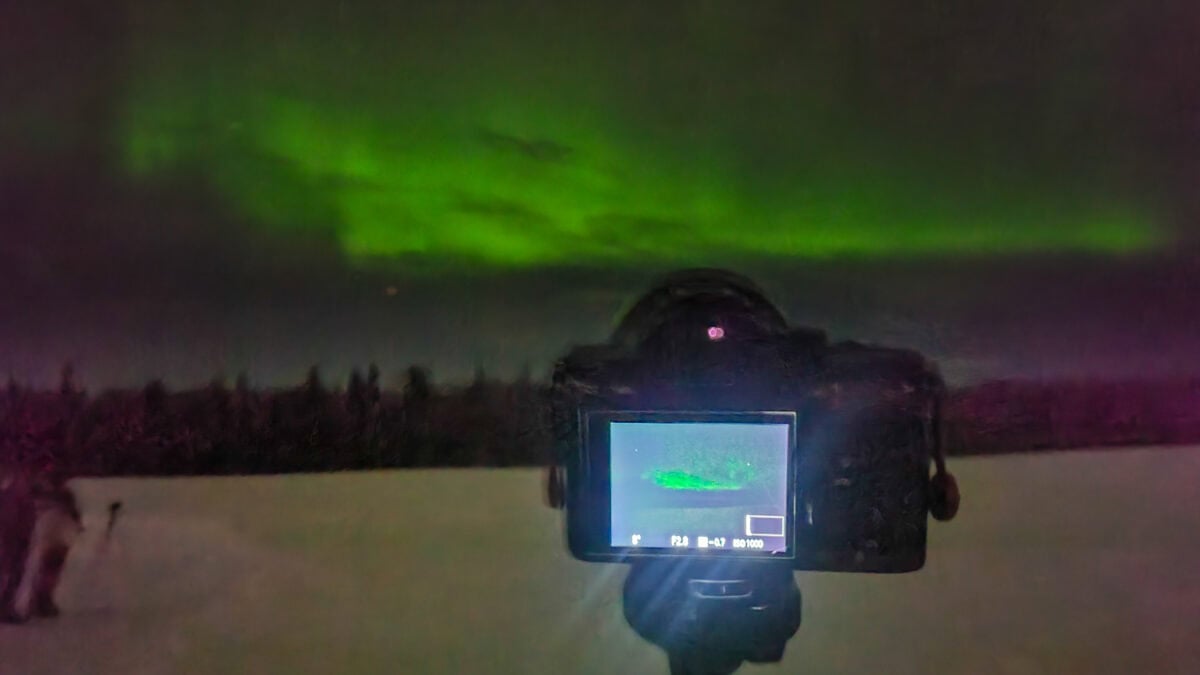
A camera with manual mode is required for northern lights photography. You must be able to control f-stop, shutter speeds, and ISO, each manually – more on the settings for northern lights below. Full-frame cameras will also produce a better-quality image.
Red Light Head Lamp
Not only will you need some sort of light to light up the camera controls and adjust your camera, but you’ll also want a powerful light to help you light up the foreground, check your focus, and make your Northern Lights photography even more picturesque.
It takes about 20-30 minutes for your eyes to fully dark adapt when doing photography at night. A red light is non-glaring, so it can help you see better at night. Turn on a white light and ruin the dark adaptation of you and everyone around you. Because of that white flashlights and cell phone lights are discouraged at northern lights viewing.
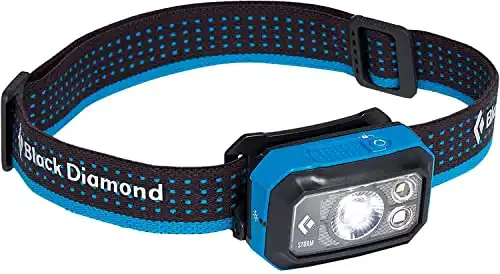
Black Diamond Storm 400 Headlamp, Azul
$47.88
The Storm 400 also has three different colored night vision modes and peripheral white lighting for close-range activities like carefully re-racking for the final summit pitch in the dark. The headlamp has our Brightness Memory feature, which allows you to turn the light on and off at a chosen brightness without reverting back to the default, full power setting.
Buy Now
12/16/2023 05:58 am GMT
Remote Shutter Release
This isn’t required, but many people use remote shutter releases for night photography to reduce any possibility of camera shake when you physically hit the shutter button. Some remote releases have additional options like an intervalometer, lightning trigger, and remote control of camera settings.
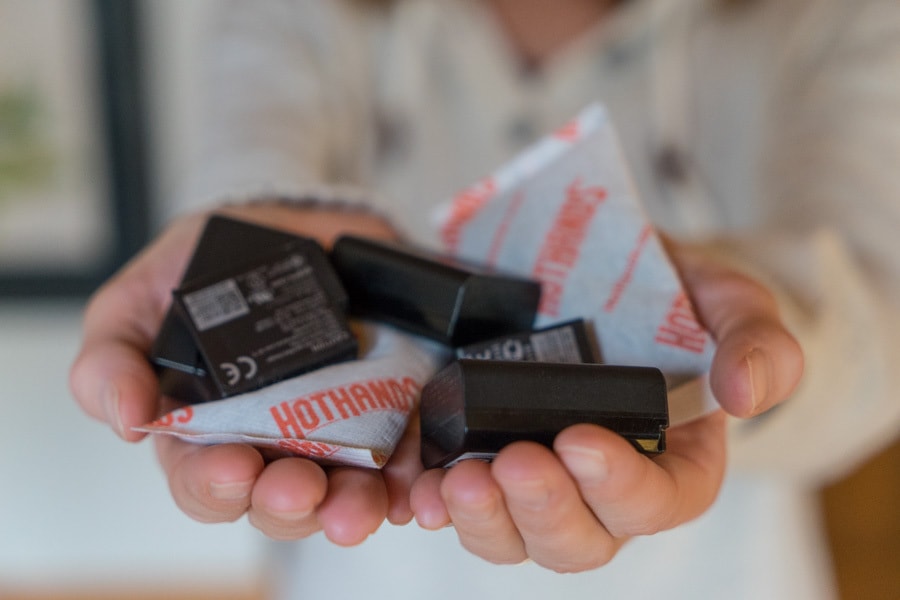
Extra Batteries
In cold weather, battery life goes fast. Make sure you always have extra batteries when you are chasing the northern lights. Take more than you think you’ll need! In Fairbanks, I was often shooting in -10 to -20, and our camera battery life was minimal.
My rule is to bring double the batteries than what you think you may need. I had 5 with me and there were nights where I practically went through all of them.